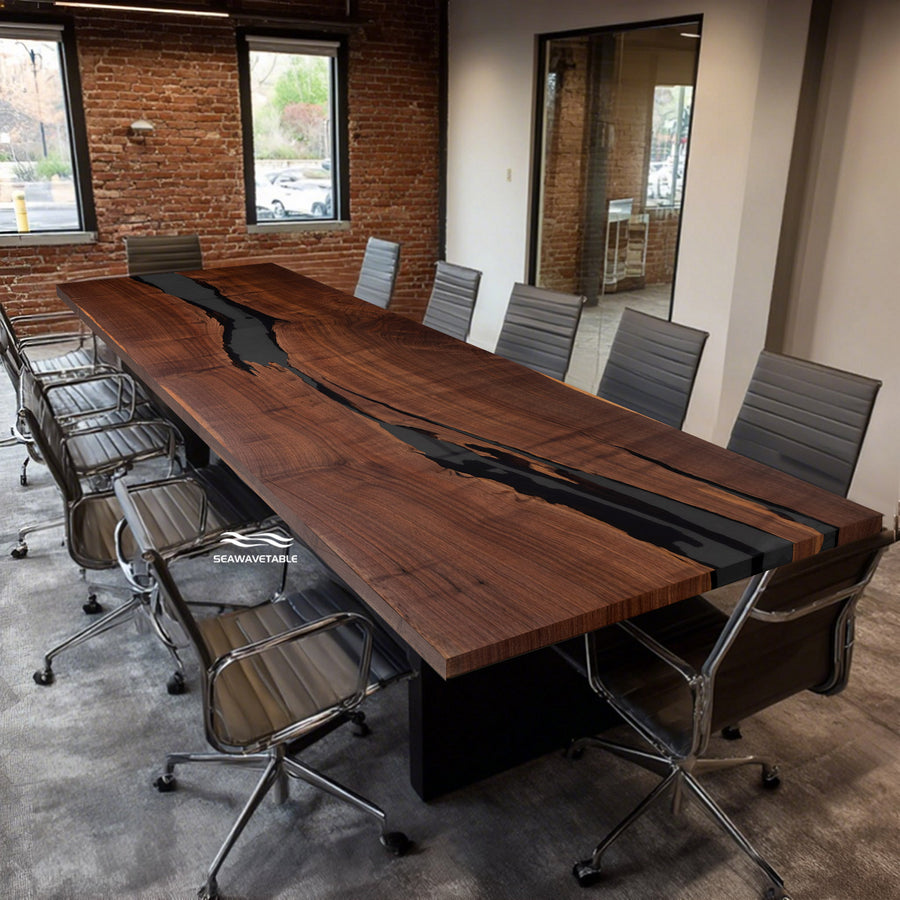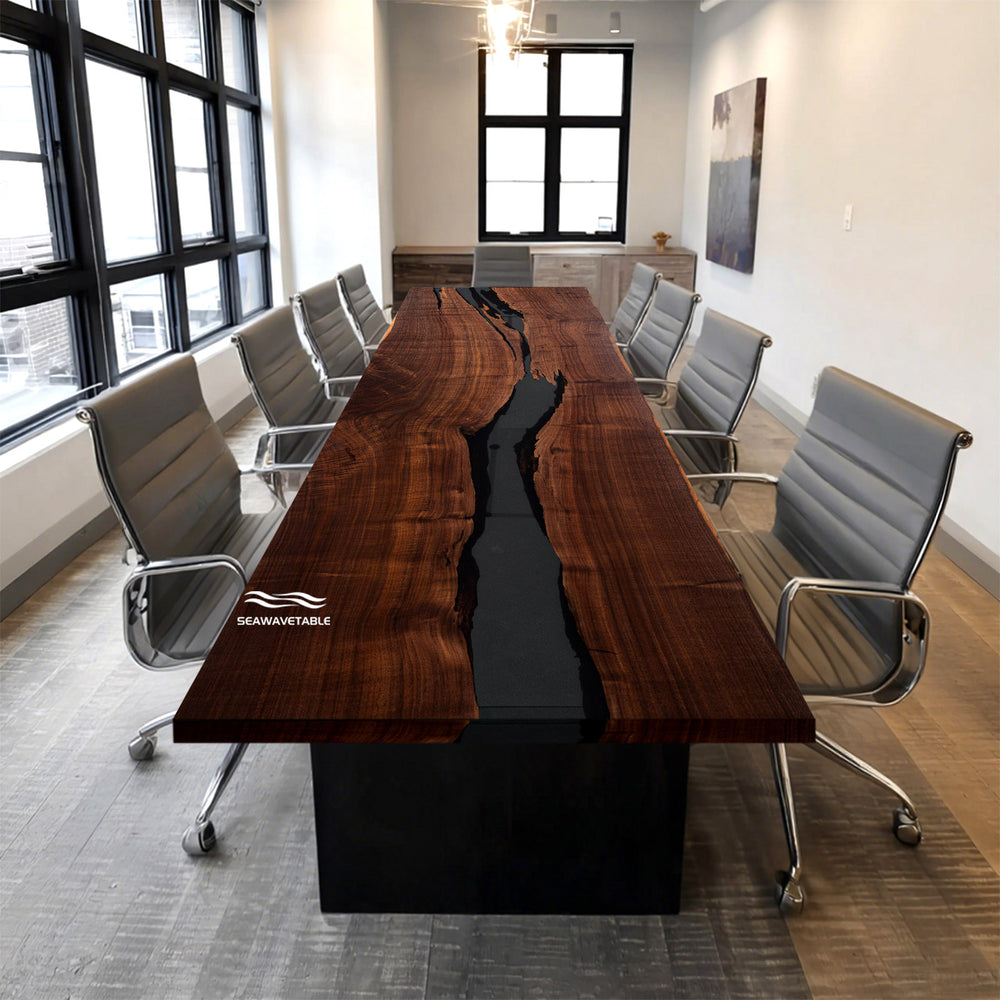


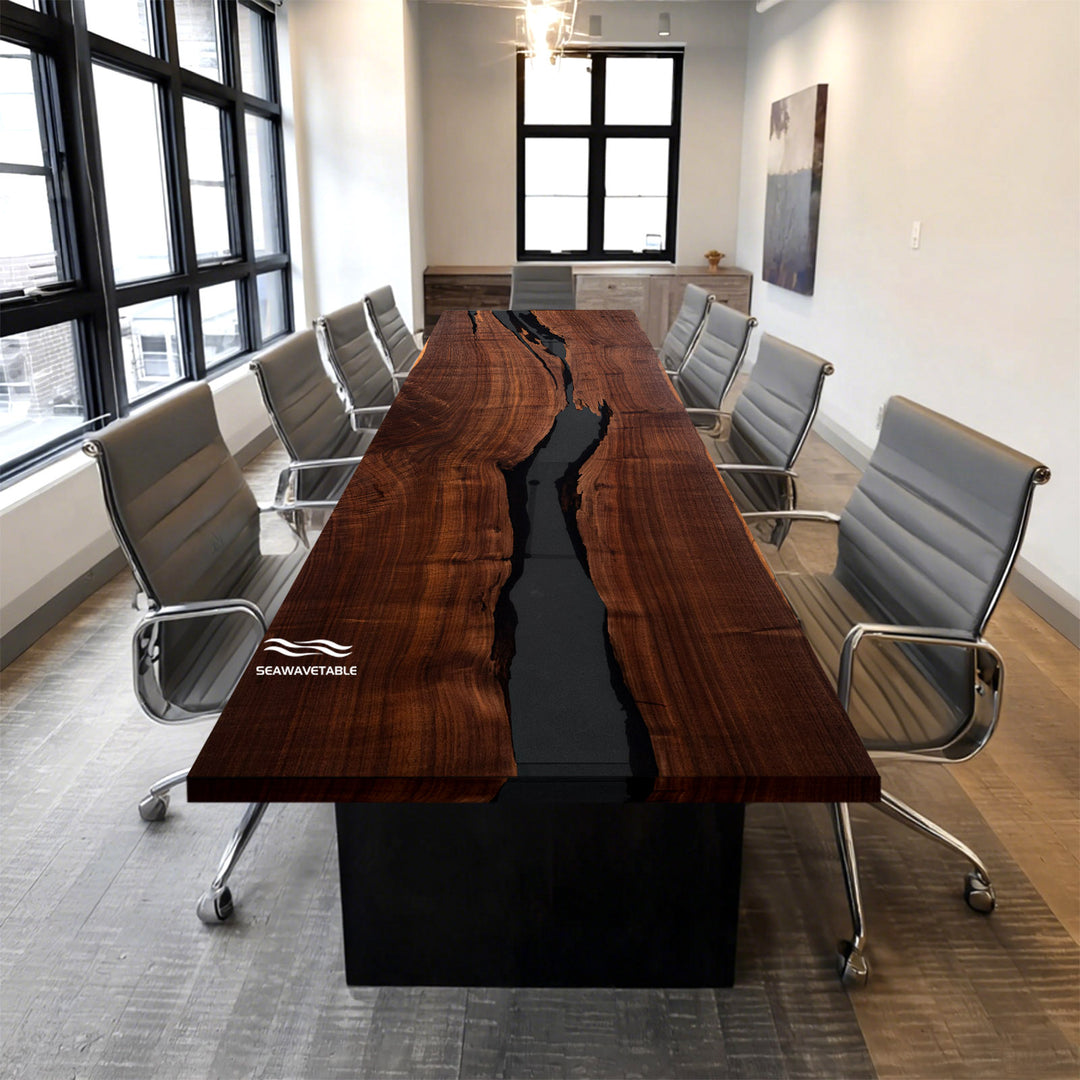


Custom Large Black Walnut & Black Epoxy Conference Table for 16–20 People – Handcrafted Executive Meeting Table CRT-149
Custom Large Black Walnut & Black Epoxy Conference Table for 16–20 People – Handcrafted Executive Meeting Table CRT-149
-
-

Product Overview
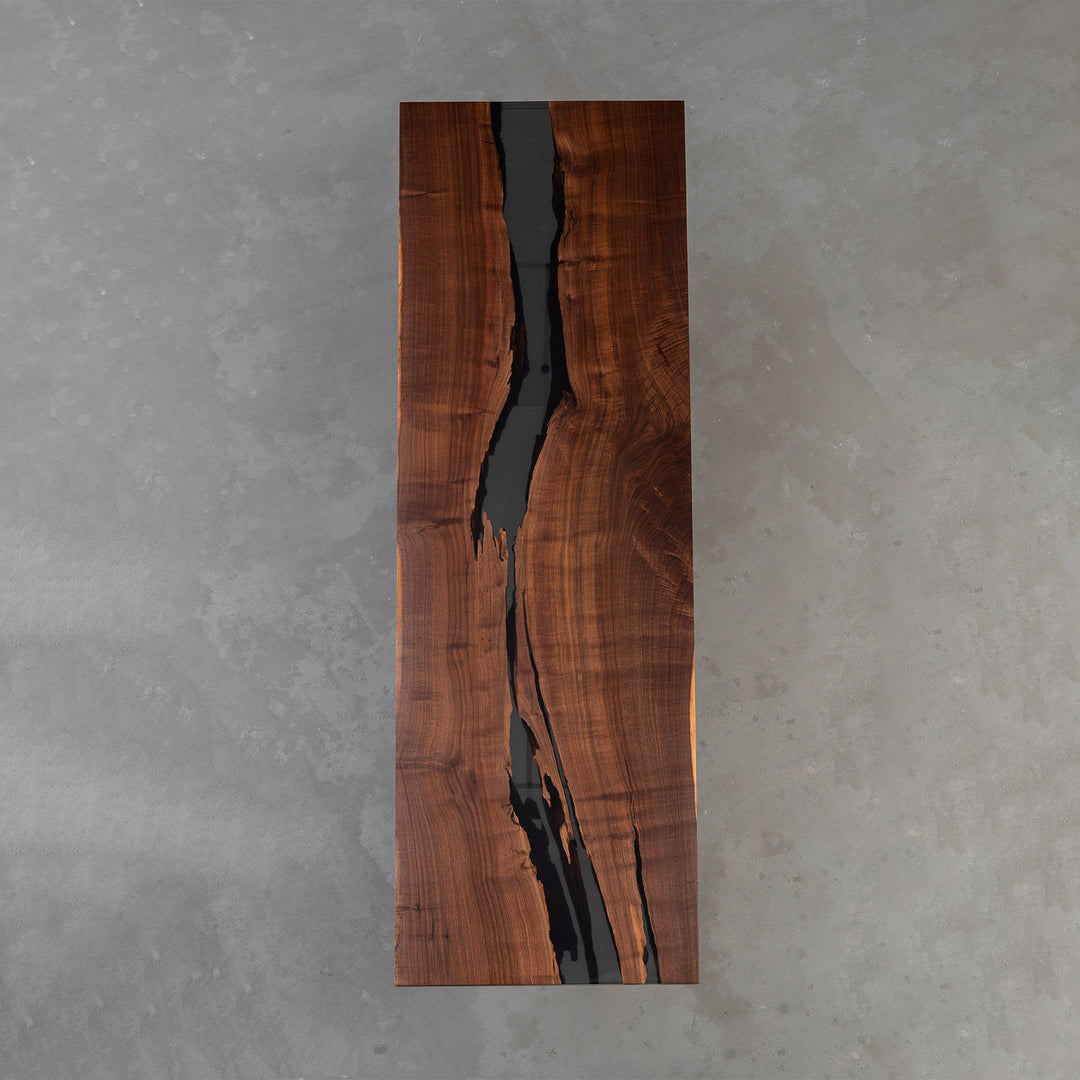
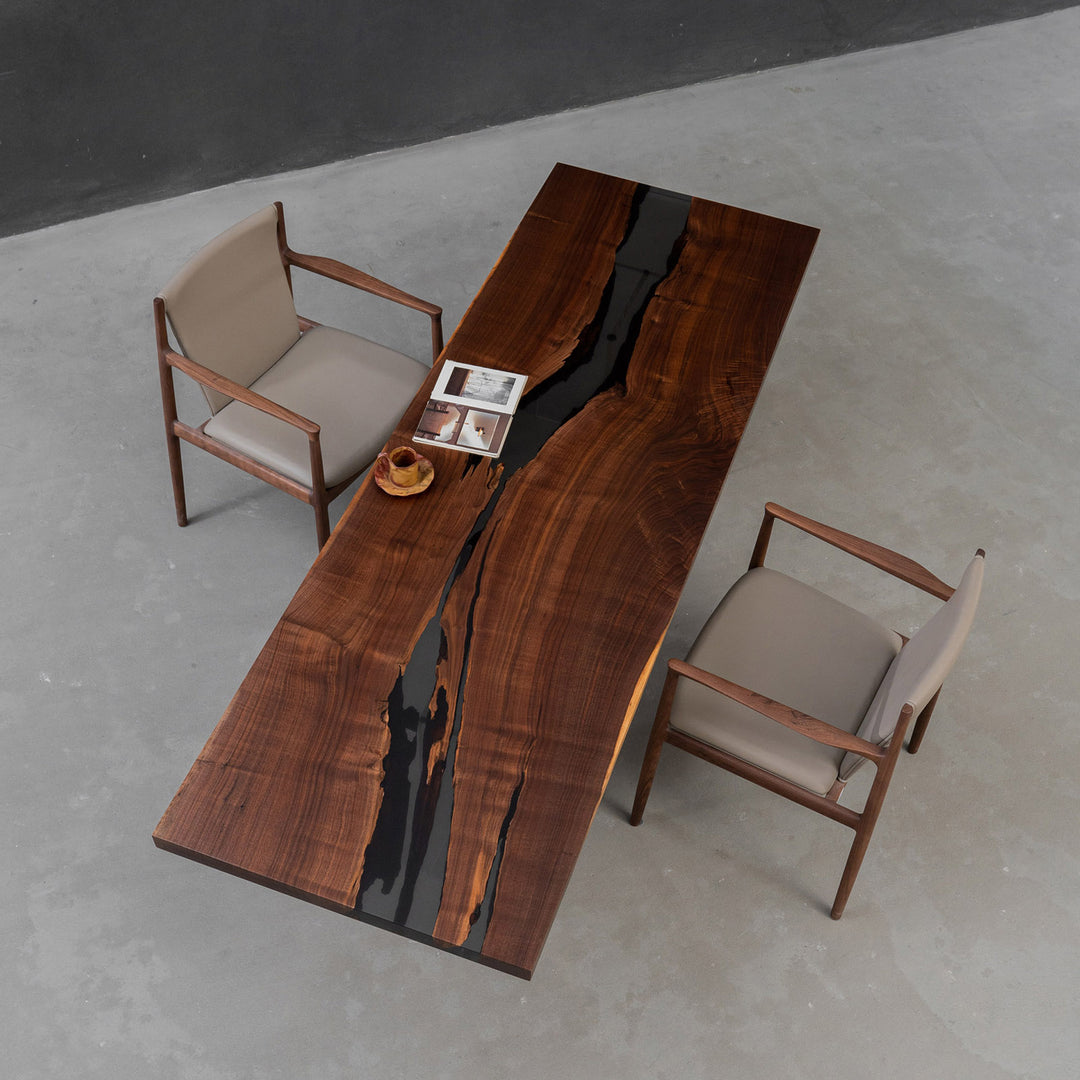
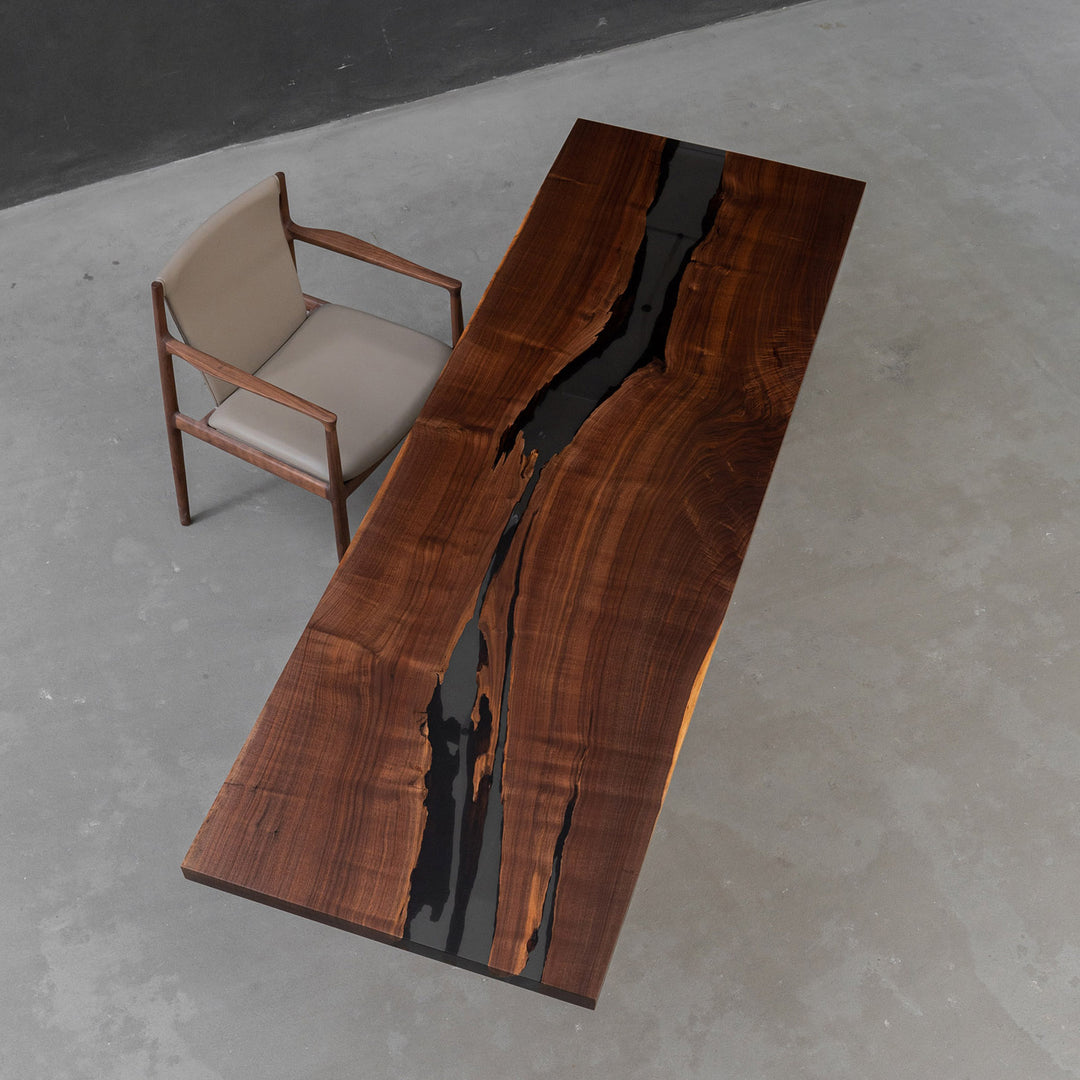
The CRT-149 is a handcrafted executive conference table designed for large boardrooms and modern corporate spaces. Measuring an impressive 4 × 16 feet, this masterpiece combines natural black walnut wood with translucent black epoxy, achieving a sophisticated balance between strength, depth, and elegance. Its straight edges and fully matte finish convey a refined, contemporary aesthetic ideal for high-end boardroom environments.
Product Details
-
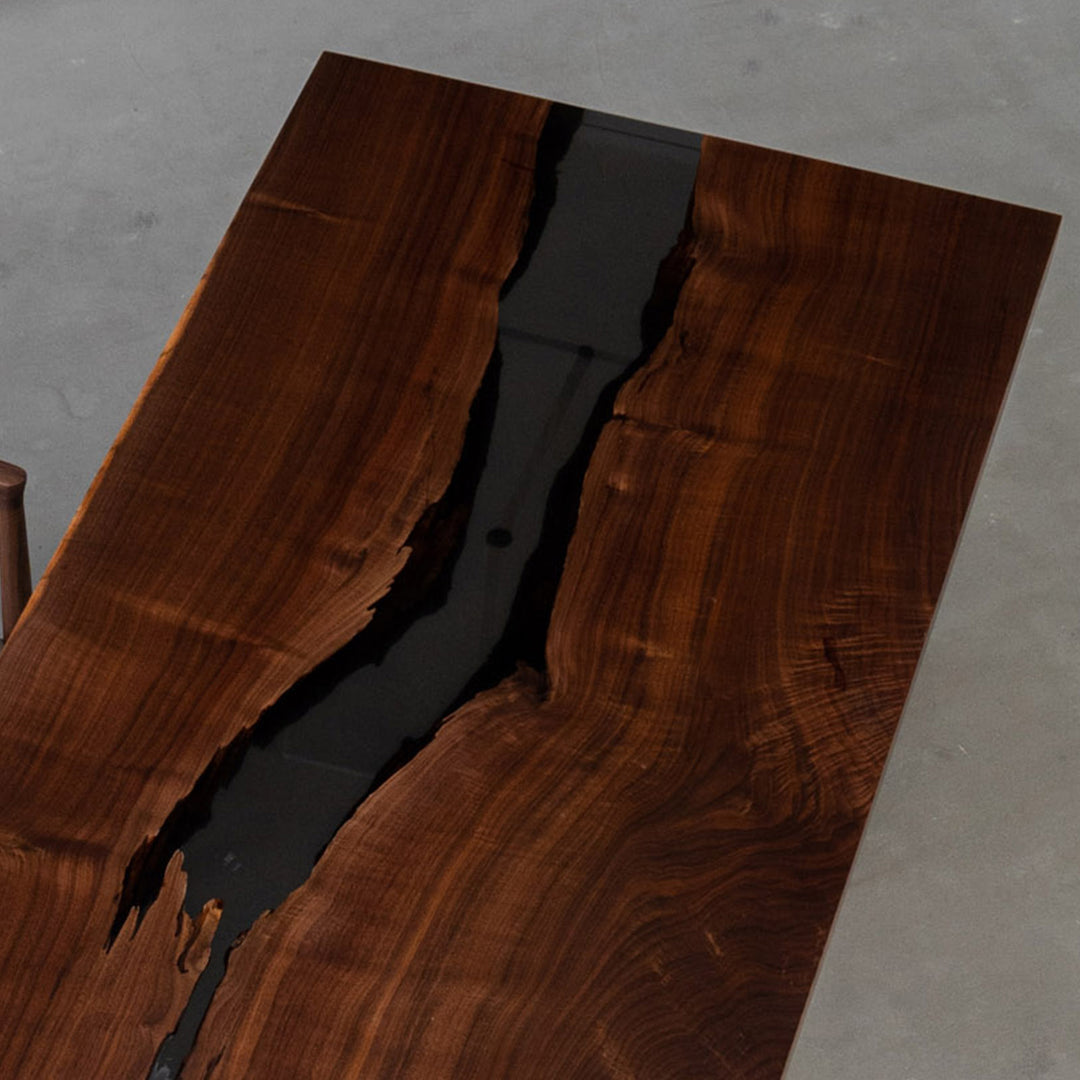
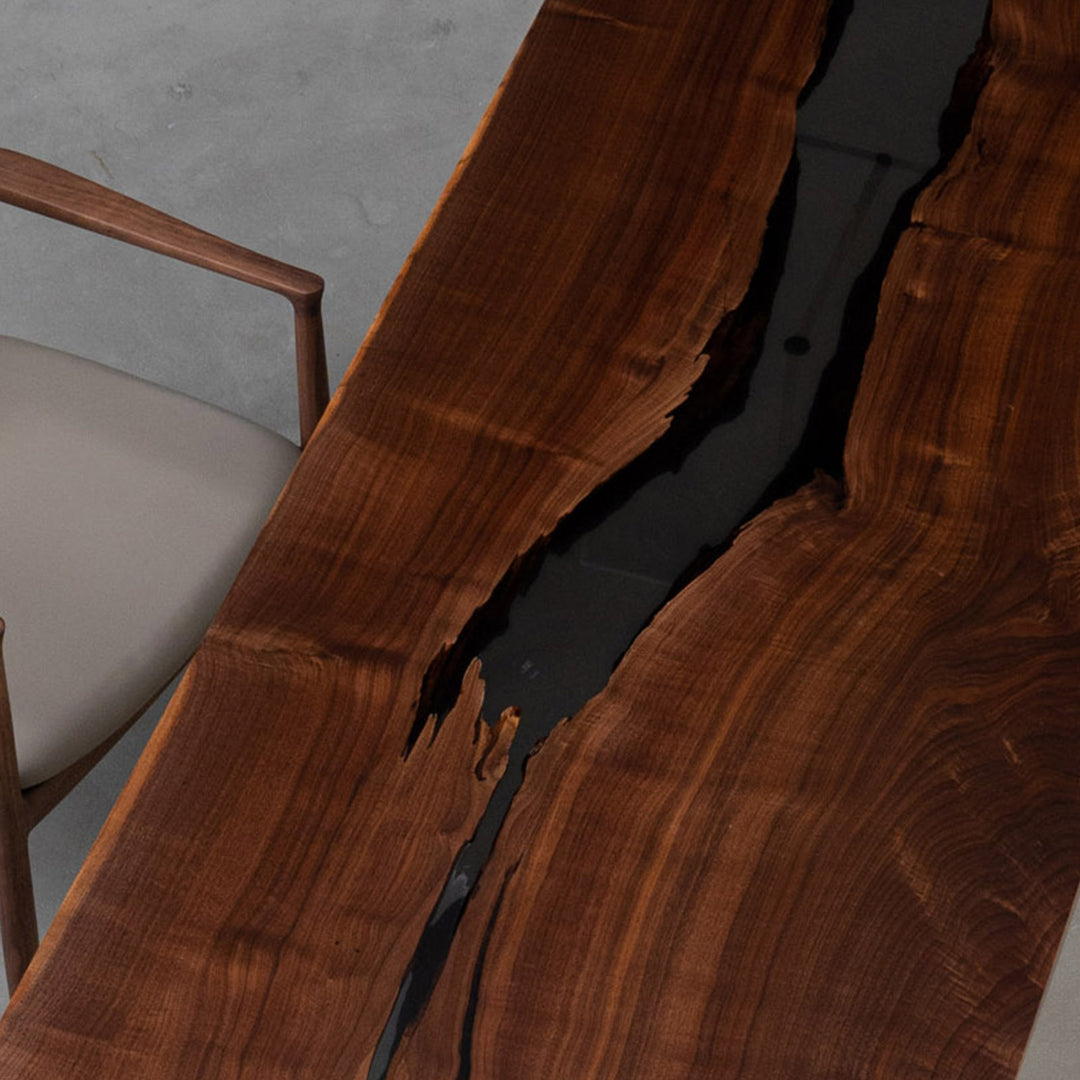
Wood Type: Premium Black Walnut, prized for its rich grain and enduring durability.
-
Epoxy Resin: Translucent black resin, allowing subtle light play and depth without losing the wood’s natural character.
-
Shape: Available in rectangular, oval, or boat-shaped designs to suit various corporate meeting layouts.
-
Edges: Straight edge for a clean, professional silhouette.
-
Surface Finish: Full matte finish, providing a soft, understated texture that resists glare and fingerprints.
-
Size: Shown in 4 × 16 ft, ideal for 16–20 people in an executive or corporate boardroom setting.
Customization Options
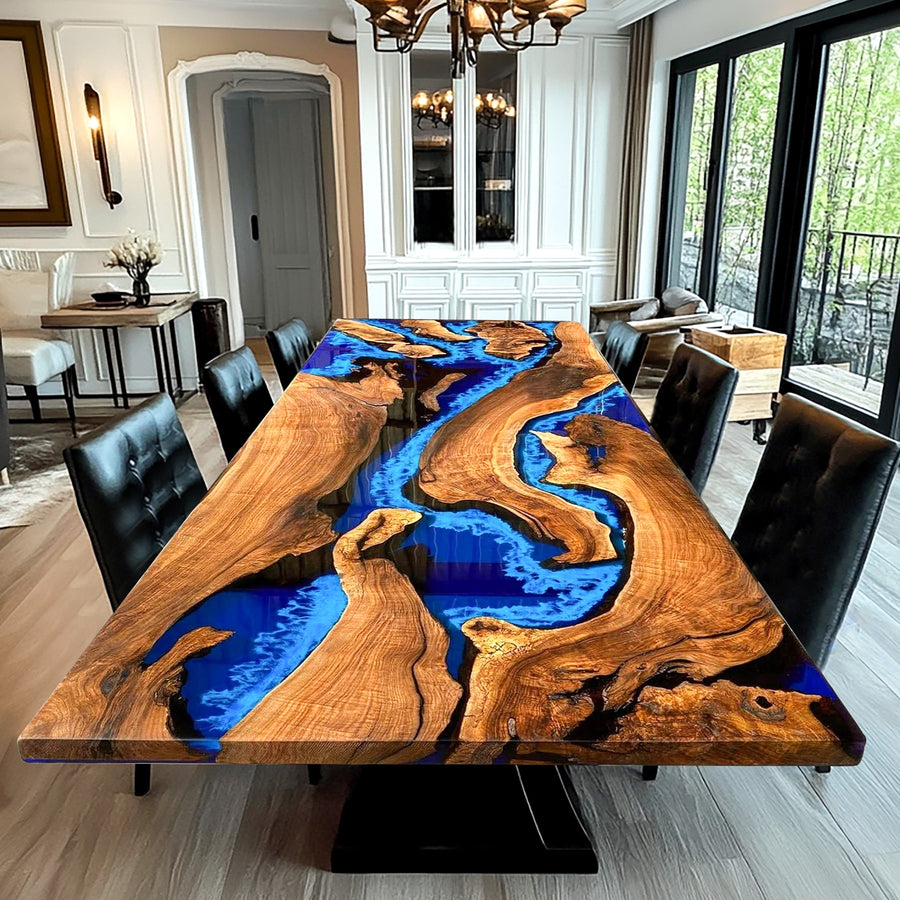
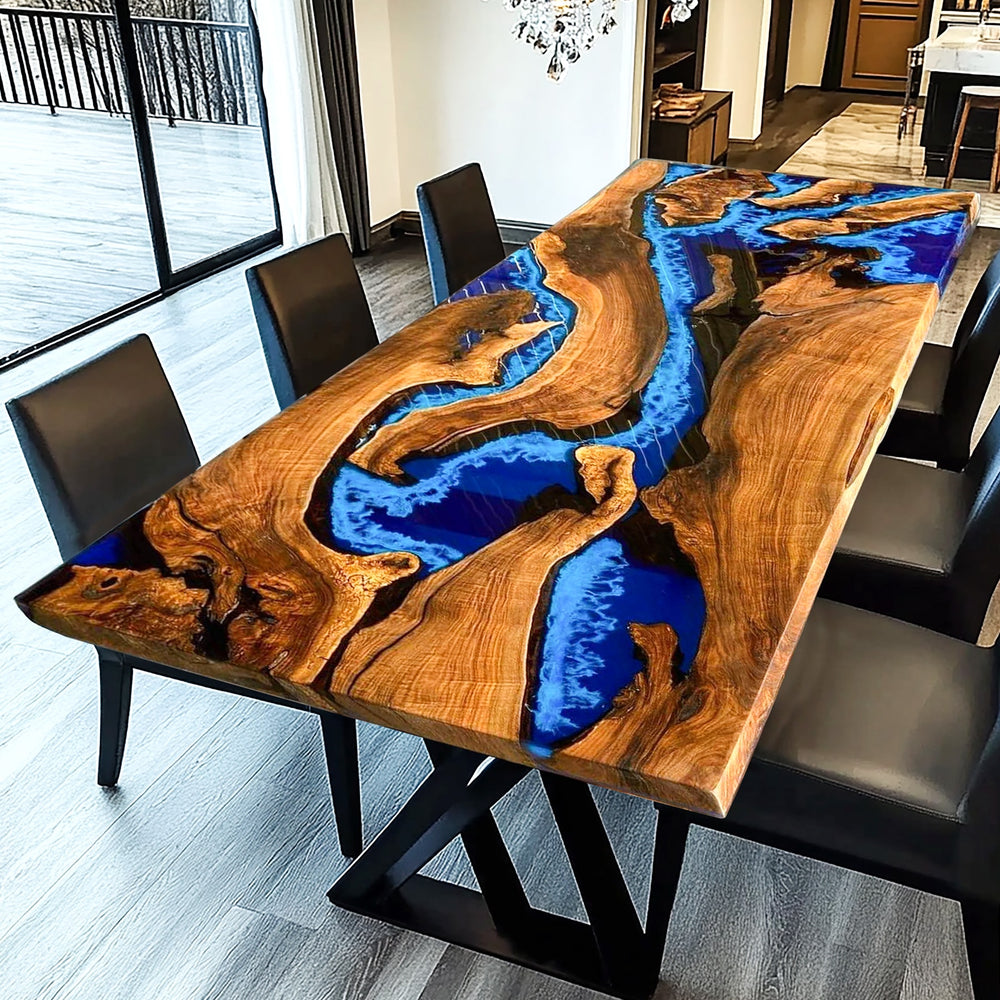
Every Seawavetable piece is fully custom-built to match the vision of your workspace.
You can personalize:
-
Wood Type: Black walnut, oak, ash, or other solid hardwoods.
-
Resin Color: Choose from clear, translucent black, ocean blue, smoky gray, or custom tints.
-
Size: Scalable for 8 to 20+ seats, tailored to your boardroom dimensions.
-
Edge Style: Straight, live edge, or natural contour.
-
Surface Finish: Matte or high-gloss finish available.
-
Shape: Rectangular, oval, or boat-shaped configurations to complement your executive office style.
Every Seawavetable conference table is a one-of-a-kind creation — blending nature’s artistry with masterful craftsmanship to elevate your corporate meeting space into a statement of prestige and purpose.